So you’ve done your research, you bought your perfect planner pages, and now… you’re stuck. How do you print those beautifully designed and artfully crafted planner pages that you bought maybe here? Well I am about to show you. If you’re interested in seeing all the print tutorials, you can hop on over to this page. But in this post I’m going to show you how to print Classic Happy Planner size pages on Windows.
So before we hop in – Classic Happy Planner size pages measure at 7″ wide and 9.25″ tall, and they fit into the Classic Happy Planner by MAMBI (available at craft stores, online at Amazon & Blitzy, and a whole bunch of other places) If you’re looking for planner pages in this specific size you can see what I offer in my shop here.
what you’ll learn:
Below I go through 2 methods for printing both a full, dated planner (think 2017 daily planner) and a DIY, fill-in, random page planner. I talk about the basic steps that you’ll need to go through, and at the bottom I include a screenshot walk-through to give you a better visual. I’ve included a walk-through of my current Canon MG7720 printer (inkjet) as well as my previous Samsung printer (laser).
from start to finish, you will need the following items:
1 a computer with Adobe Reader
I always suggest having the latest Adobe Reader program. It’s free and it works the best with my pages (and most pages) because I design in Adobe.
2 printer and printer paper
3 a paper cutter of some sort
4 a hole punch (MAMBI sells a special punch for the Happy Planner)
If you want more info on planner basics check out this blog post .
and now a disclaimer:
While I try to do my best to cover as much as I can when it comes to printing, I cannot know what every printer is like. I also cannot promise that my ways of printing will work for you or will turn out as well as they do for me. I do suggest that if you are having issues with your printer you google the problem first, as those familiar with your printer will likely be able to help you more than I can. If you can’t find your answer, feel free to leave a comment and I can try my best. I also suggest that you be aware of your printers capabilities before you purchase any planner pages.
Also everything is based on using US Letter size paper as the basic printer paper.
Download disclaimer – Please don’t share any files from Rourke Planners with others – instead share the website URL with your friends, enemies, or awkward acquaintances.
Any files, free or purchased, from Rourke Planners are copyrighted works and for personal use only. You may not sell, distribute, edit, or claim any version of this file as your own. Feel free to share your usage of these files on social media – you don’t have to tag me but it’s super appreciated. Tag me on instagram with @RourkePlanners or #myrourkeplanner.
PRINTING A DATED PLANNER – ‘AS IS’ METHOD
This is always my suggest method of printing your planner pages. It’s much easier to get pages in order for a dated planner or to get double sided pages for other pages. The basis of this method is that you have pre-cut pages and you print ‘as is’ – meaning in that page size. This method has another pro – it gives you the most usable scrap paper, compared to printing in the center and then cutting out your page.
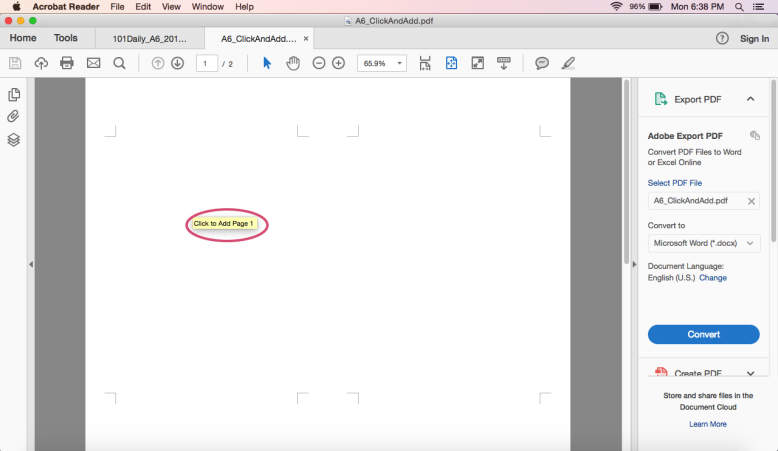
STEP 1 – OPEN YOUR PAGES IN ADOBE READER
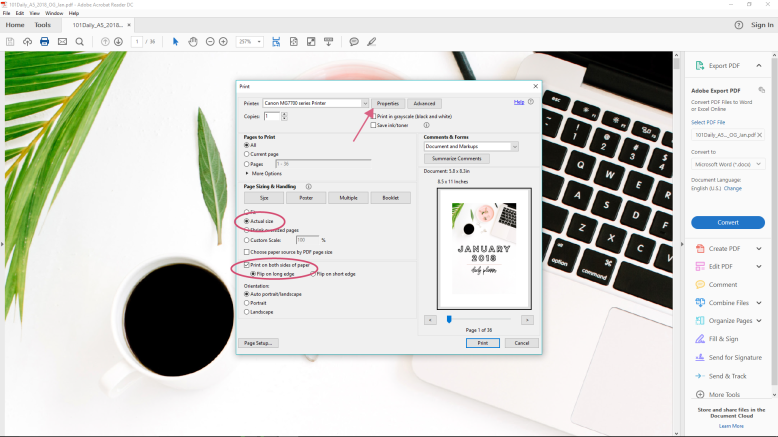
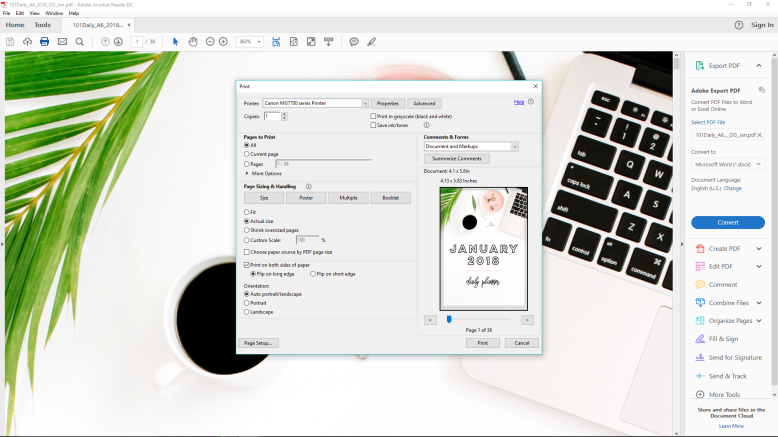
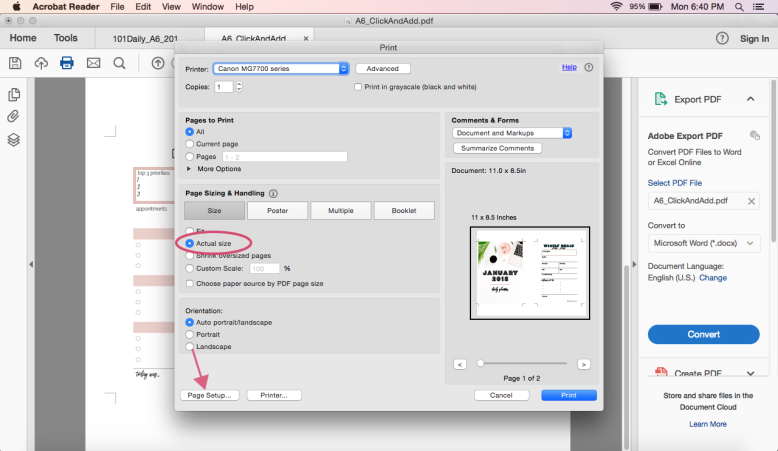
STEP 2 – HIT PRINT
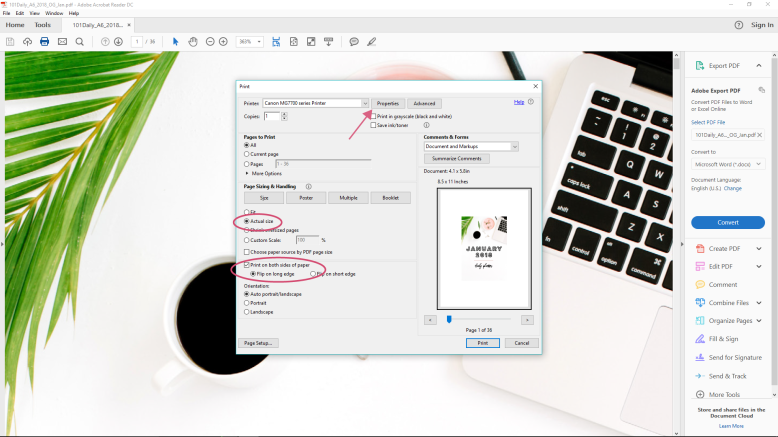
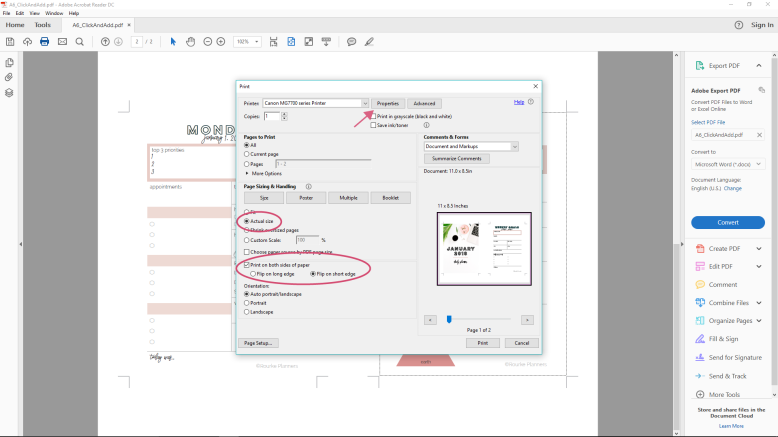
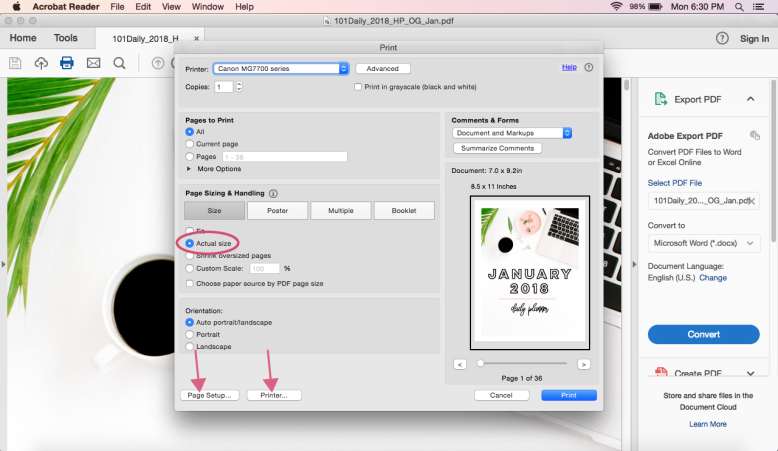
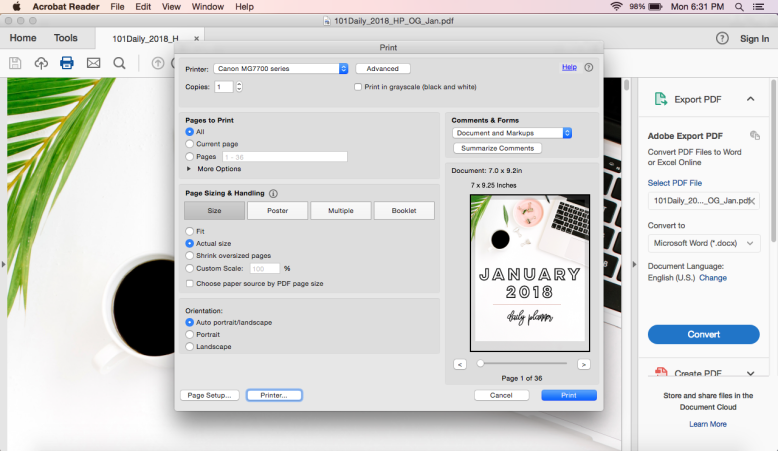
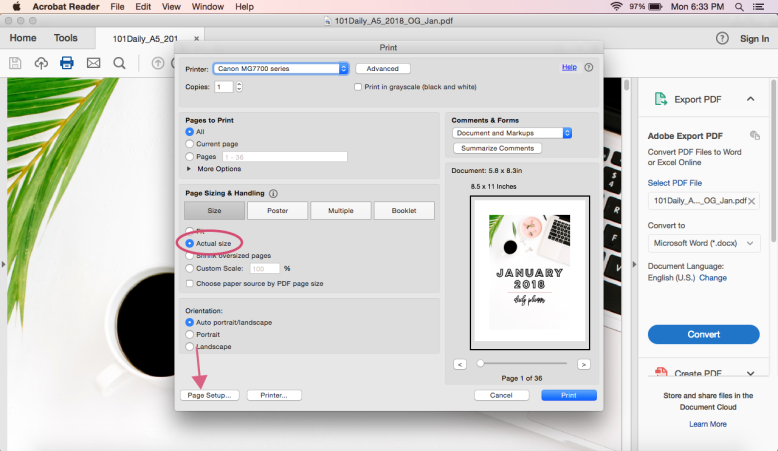
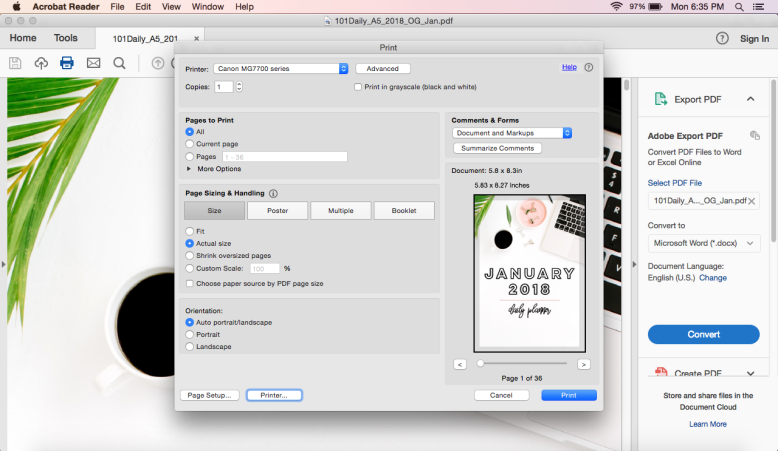
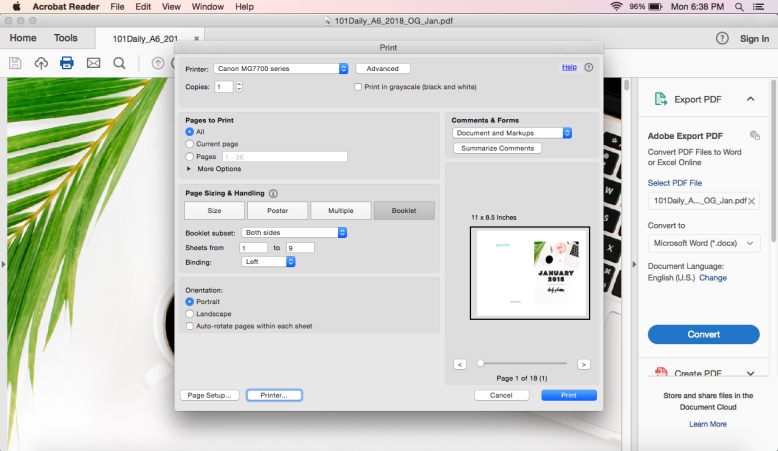
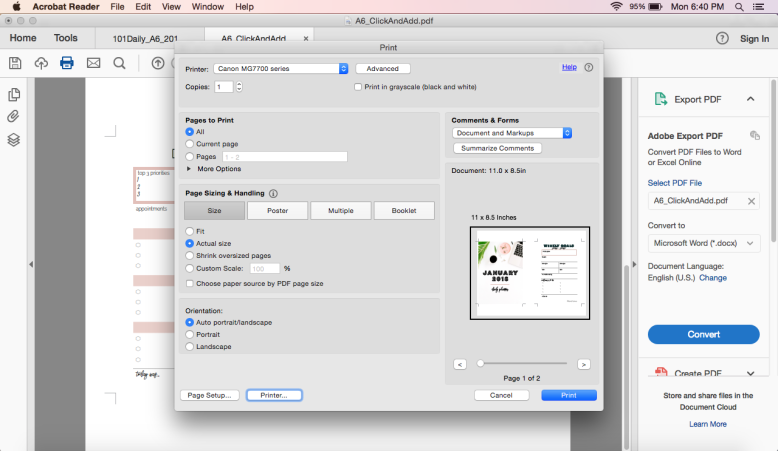
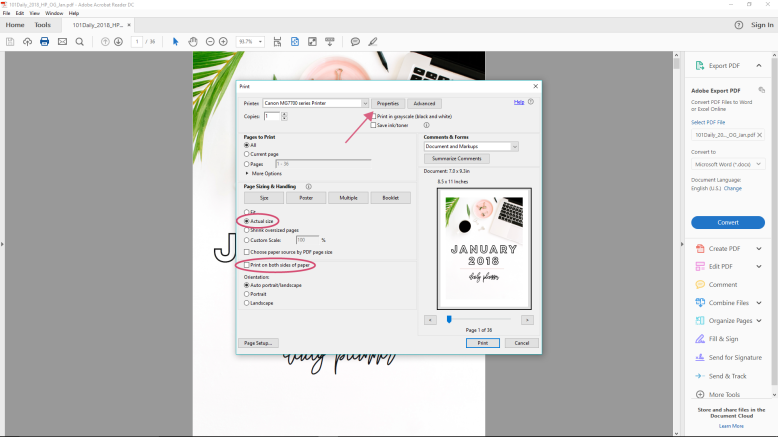
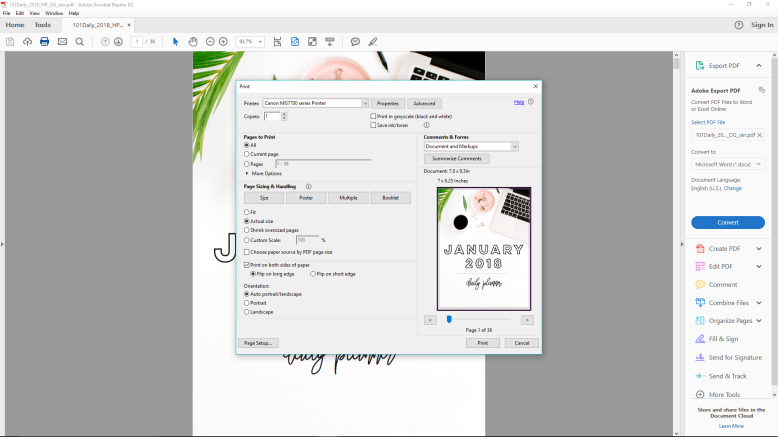
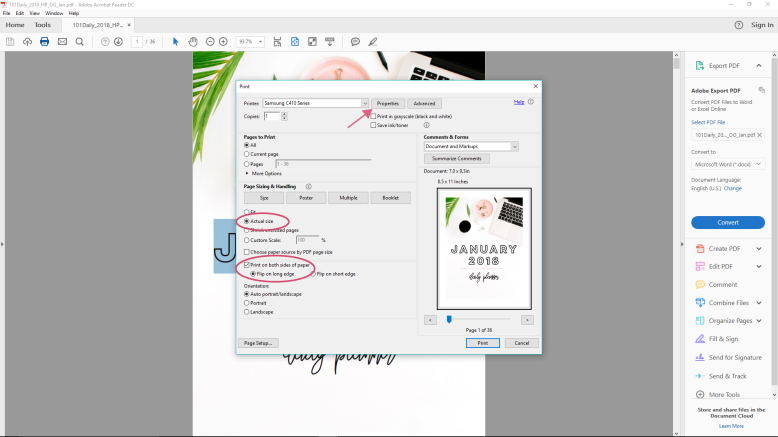
Under ‘Page Size + Handling’, be sure ‘Actual Size’ is selected.
You can also select ‘Print on Both Sides’ in this box.
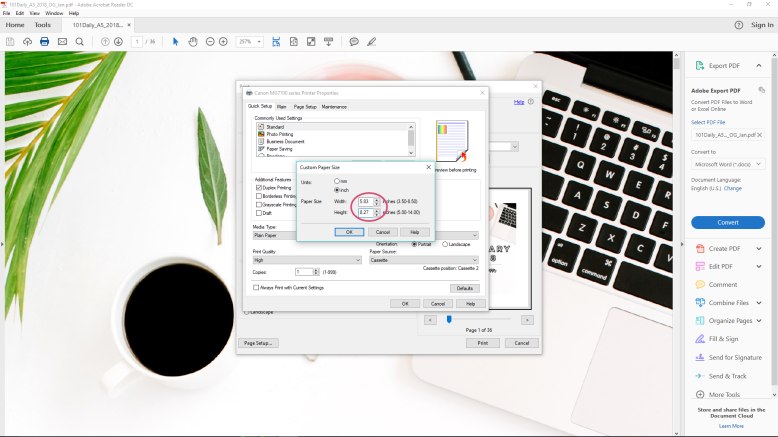
STEP 3 – HIT PROPERTIES
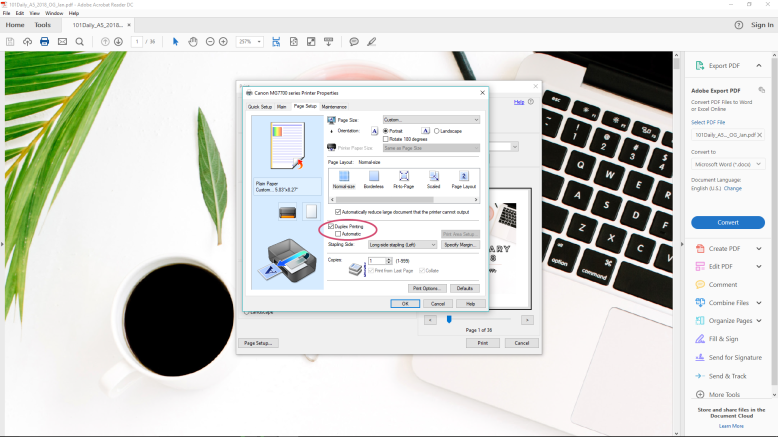
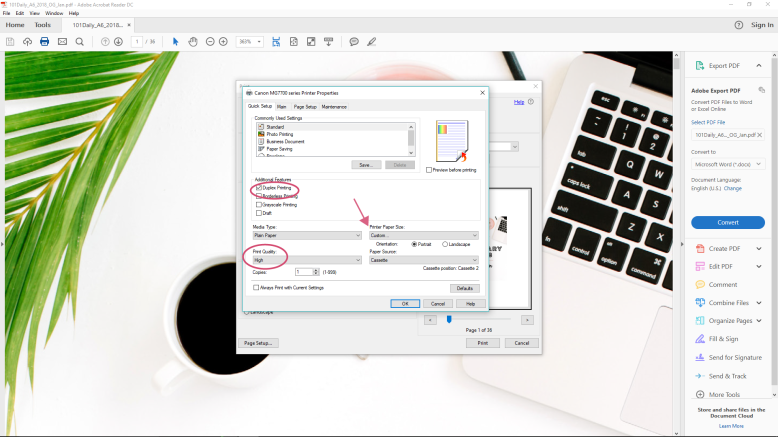
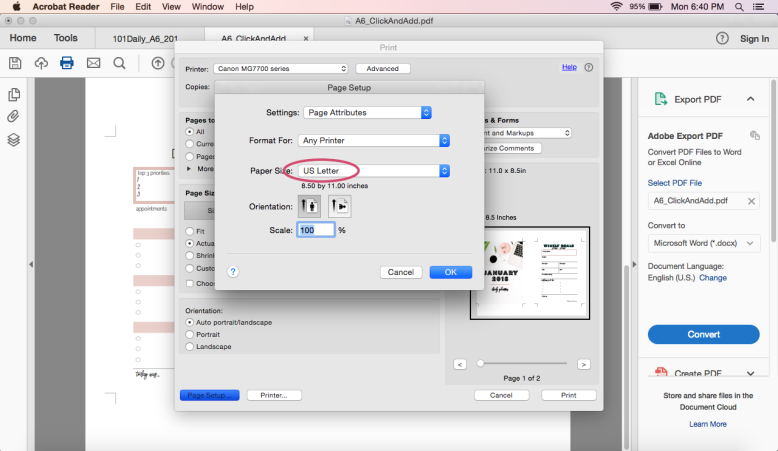
This box is more customized to your printer. You’ll want to be sure you have 3 things right:
size
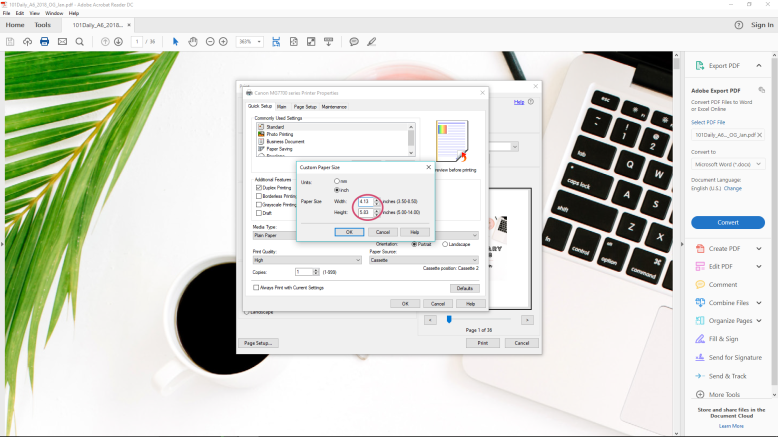
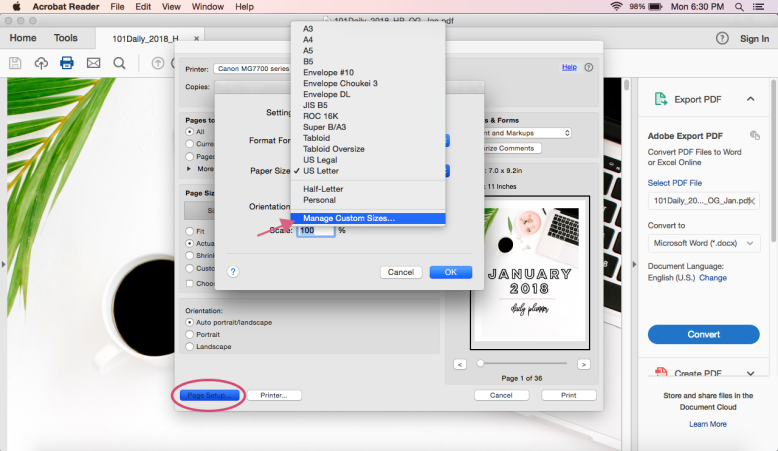
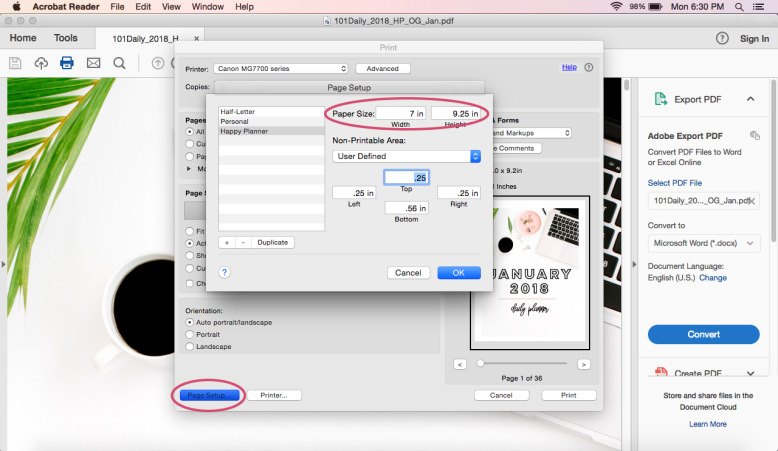
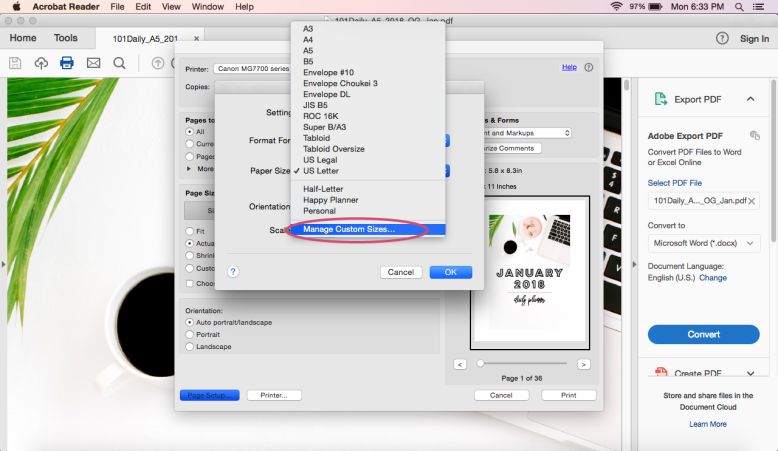
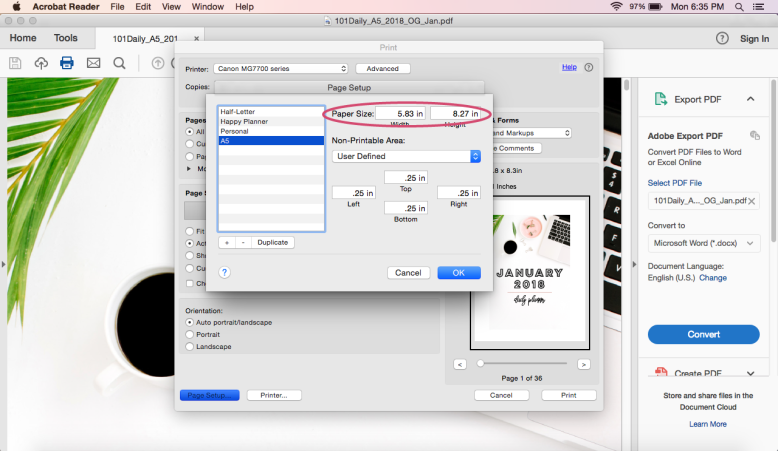
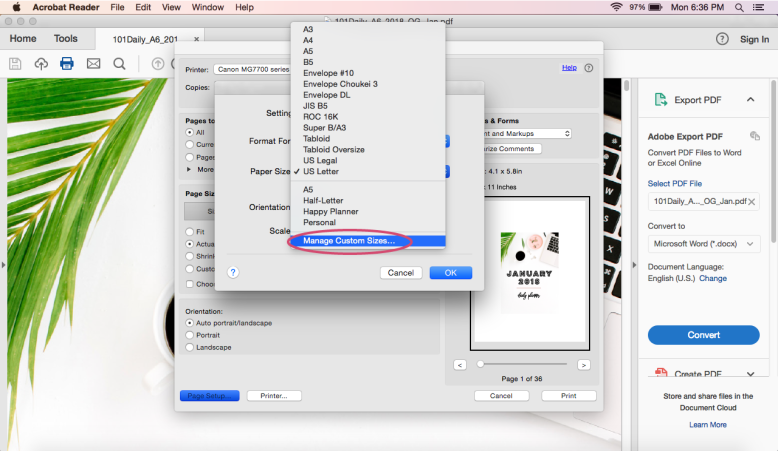
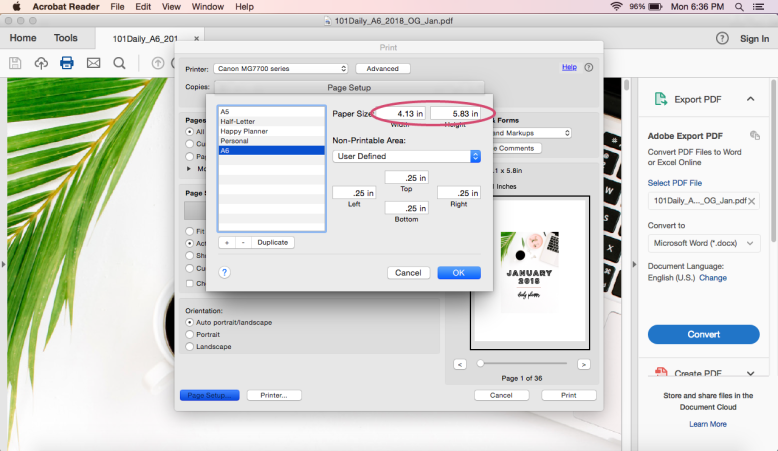
Be sure the paper size is correct. In this case, you’ll make sure it’s set to Custom – 7″ wide by 9.25″ high.
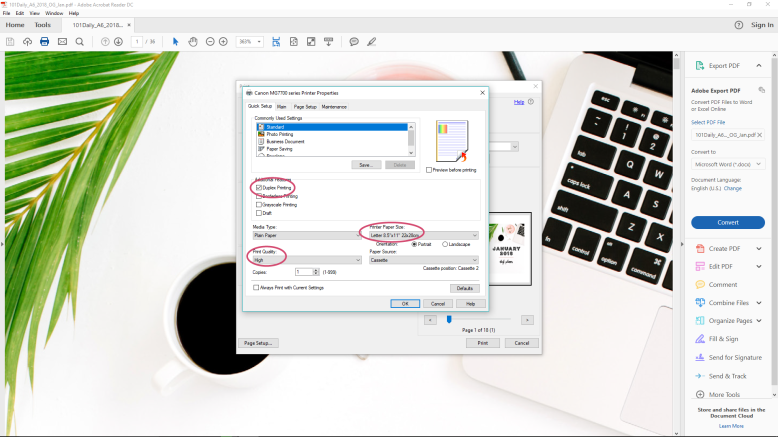
quality
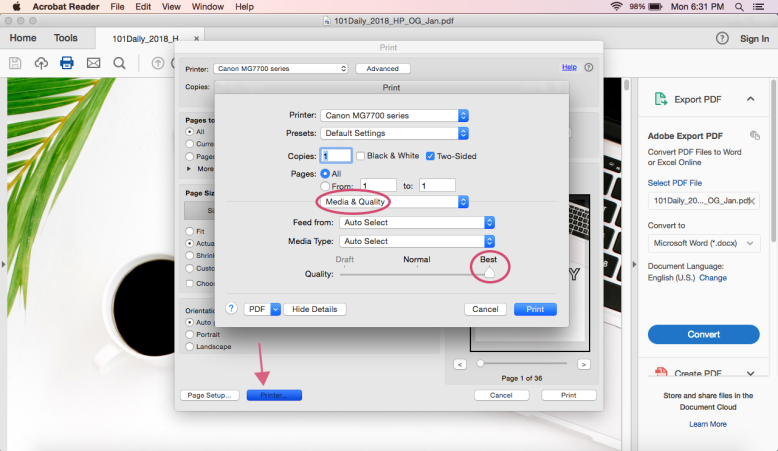
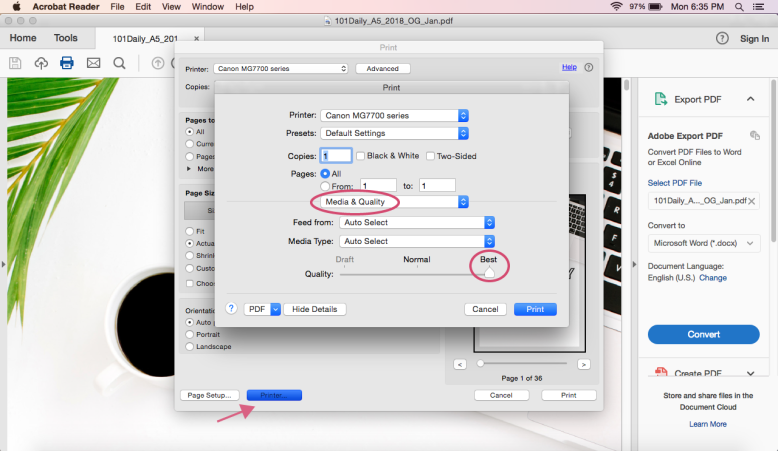
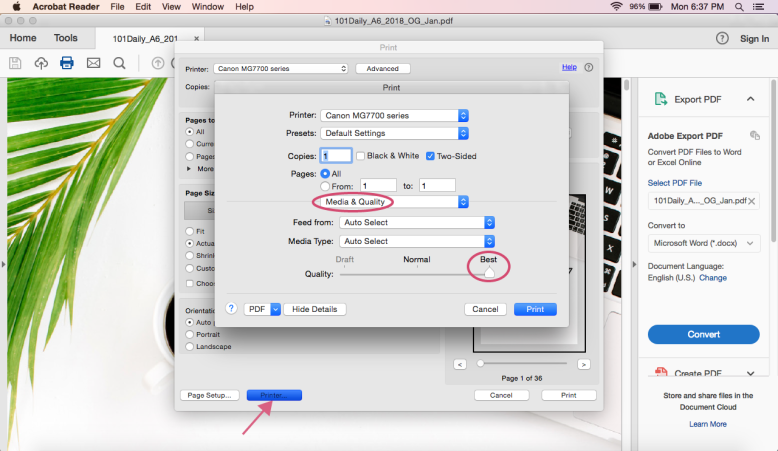
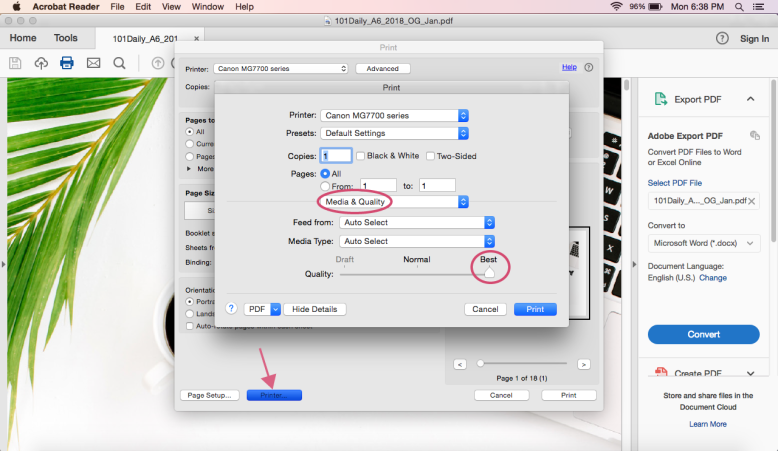
Select your desired print quality. I always suggest printing at a good quality so you have a good planner. This may mean simply ‘high’ quality, or you can select ‘photo’ quality, whichever is better. You can also manually adjust the color settings on some printers to get a more accurate match to the screen output.
double sided
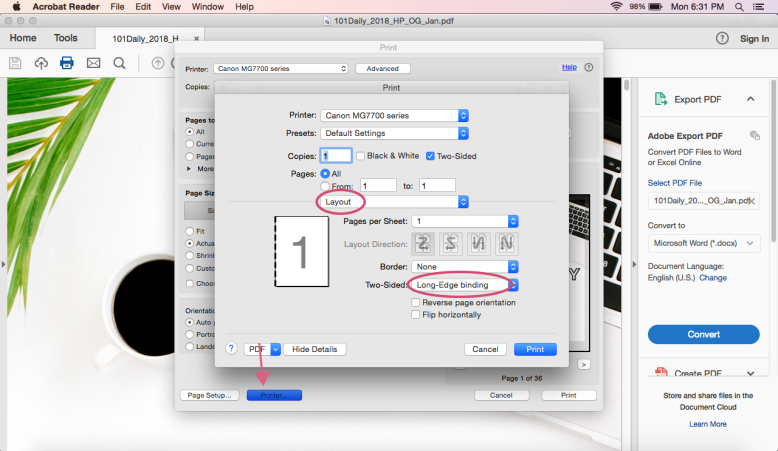
This may be displayed as ‘double sided’ or ‘duplex’ printing. Be sure to select it if your printer can handle it. My printer can only print certain sizes automatically double sided (mainly letter, for my uses); I simply un-check ‘automatic’ under ‘duplex’ printing. This means it prints out one side, you put the paper back in, and then it prints the other side. If you aren’t sure what your printer can do double-sided, you can either google or just try it out & see. You may need to just print one page at a time. I find this is best accompanied by an entertaining show.
STEP 3 – PRINT
Now all you need to do is print! And punch holes in the pages.
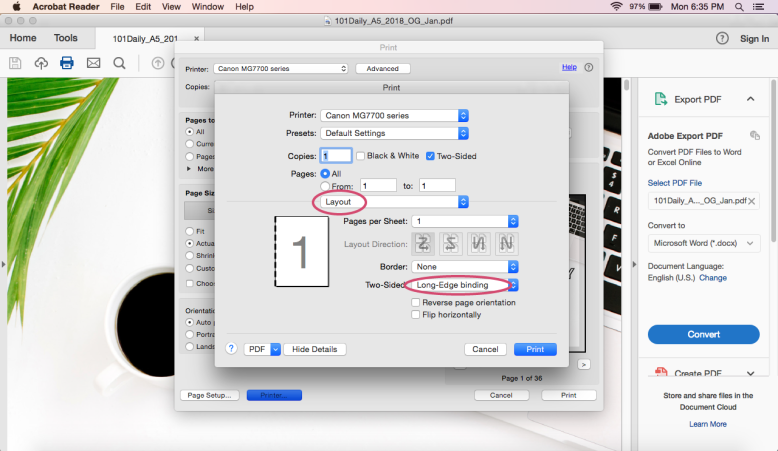
canon walk through:
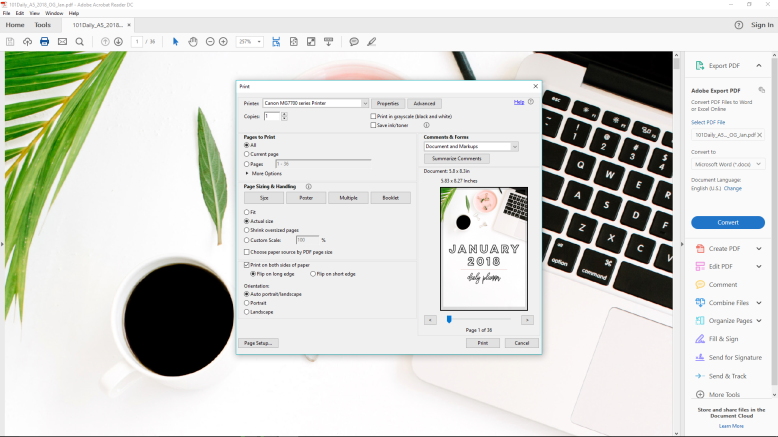
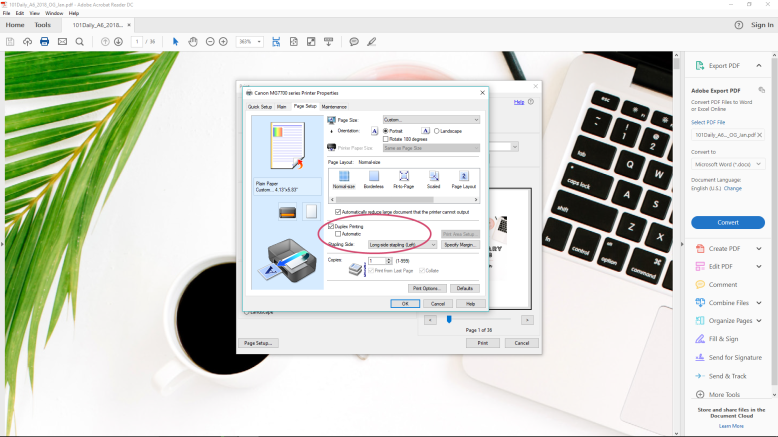
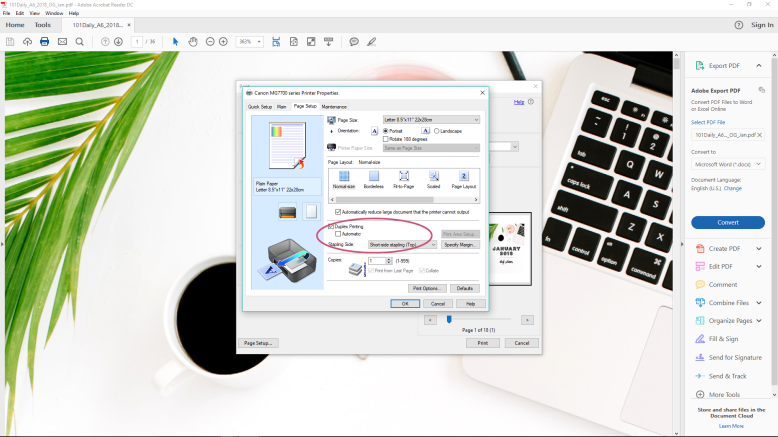
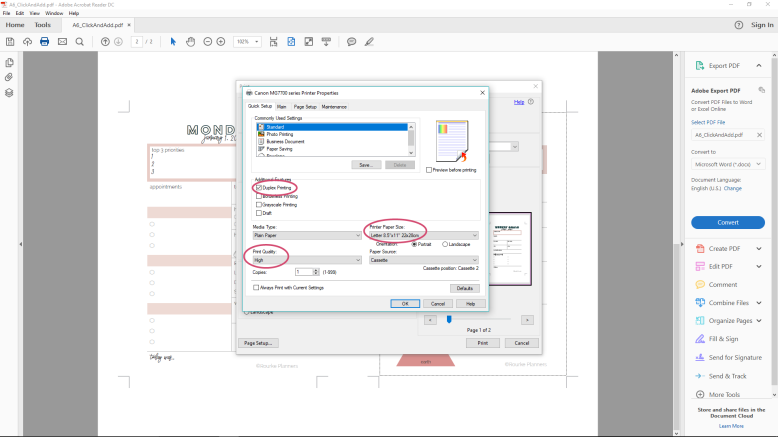
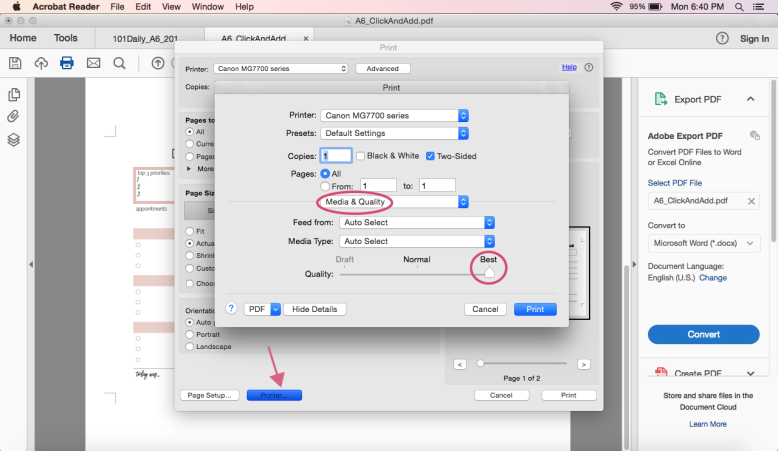
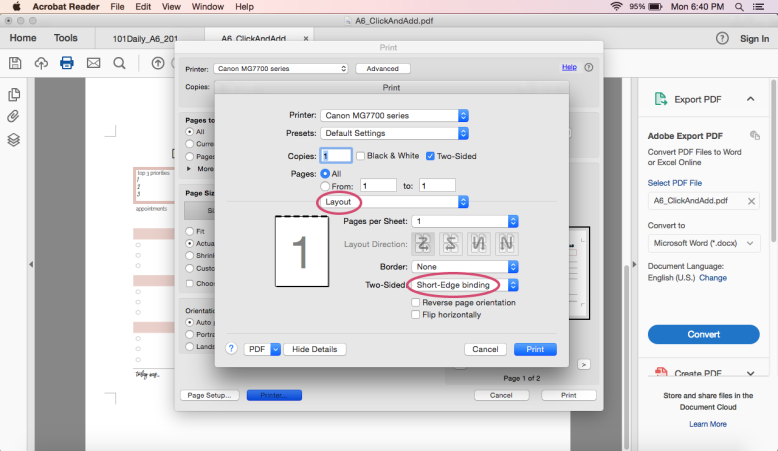
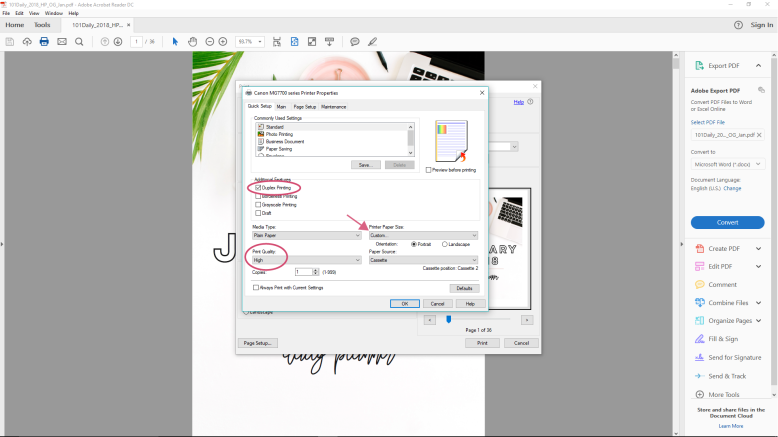
1 Print Box – Select “Actual Size” printing, select “double-sided” or “duplex” printing. Then go up to Properties.
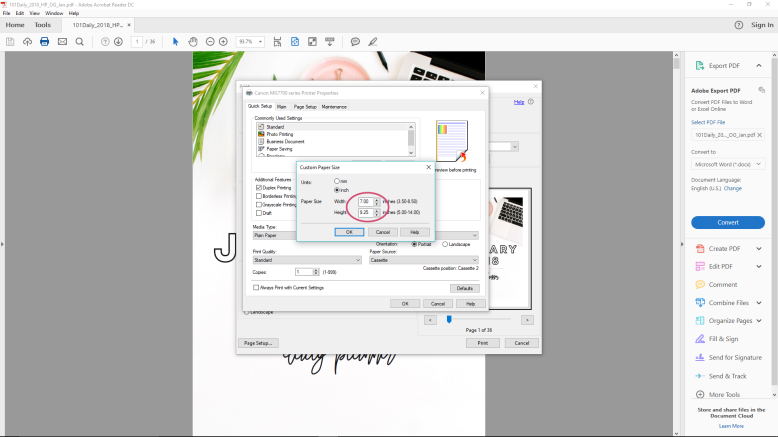
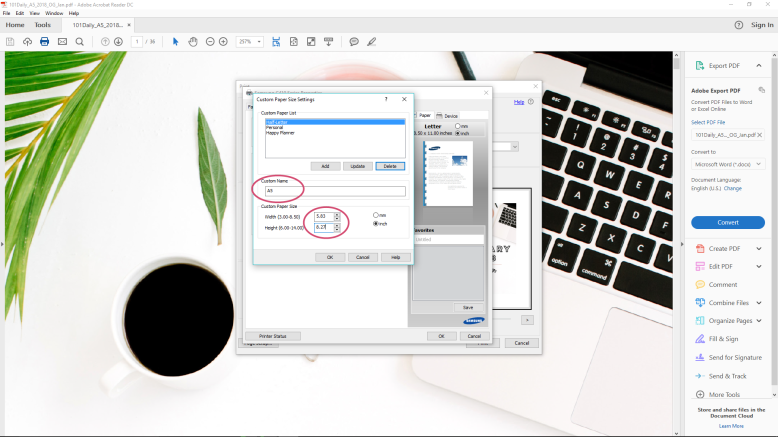
2 Properties – “Duplex” Printing is selected, quality is set to high, and then we go to page size to set it to custom.
3 Page Size – Set the page size to 7″ wide and 9.25″ high.
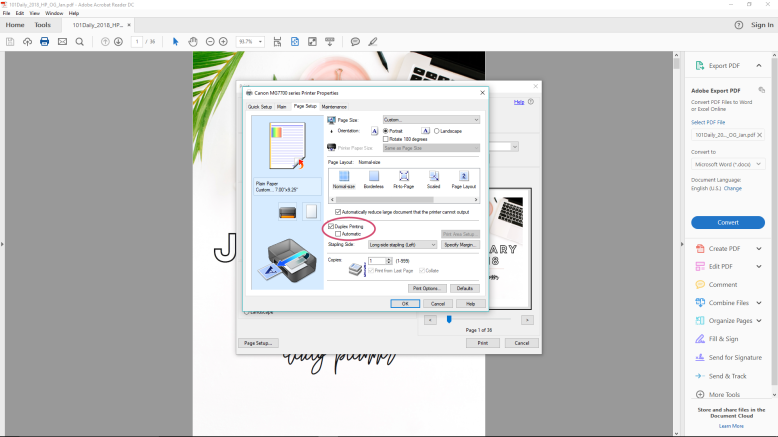
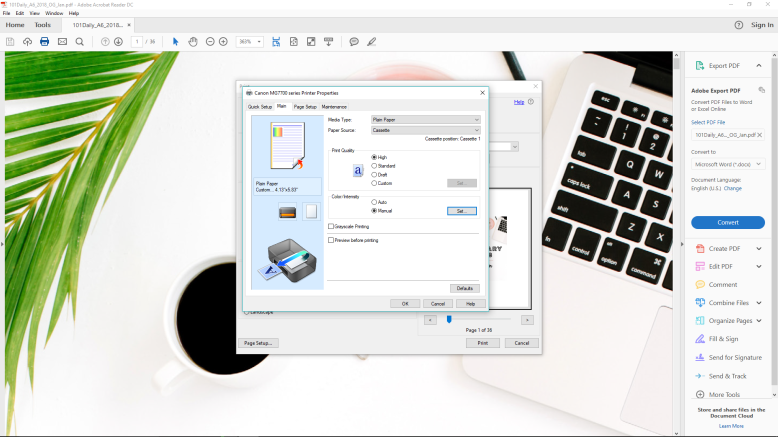
4 More Properties – Duplex printing is on, but I’ve turned off automatic because my printer won’t do it. You’ll need to try it out with your printer to see if it will print double-sided/duplex, and then if it will, if it will print it automatically.
5 Everything is set!
samsung walk-through:
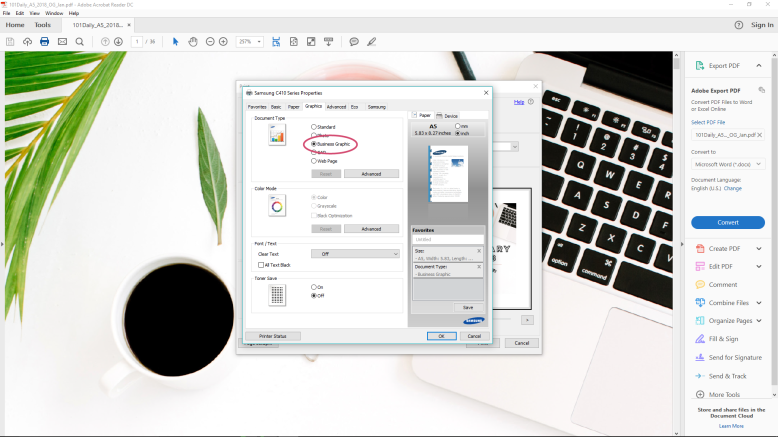
1 Print Box – Select “Actual Size” printing, select “double-sided” or “duplex” printing. Then go up to Properties.
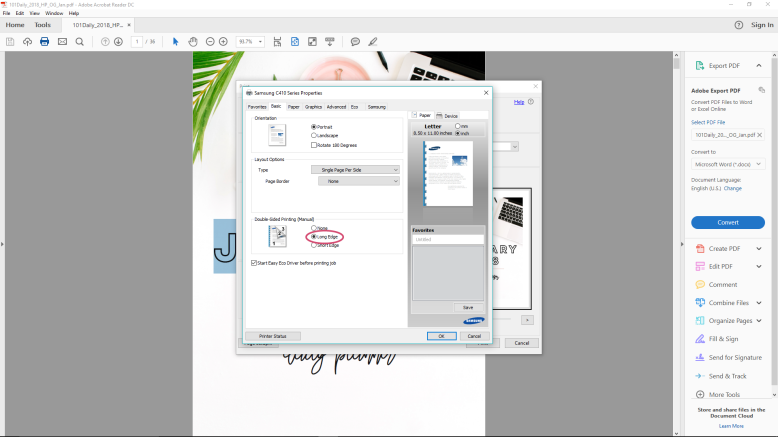
2 Properties – Double Sided Printing is selected (that’s what “long-edge binding” is for).
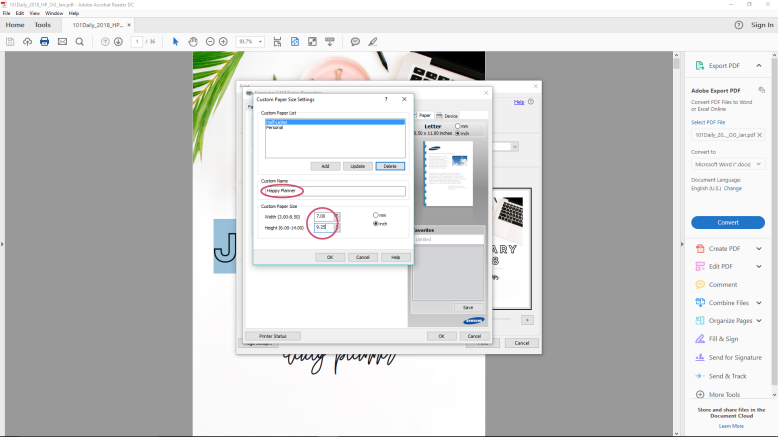
3 Paper size – We set the paper size to a new custom size. I’m able to save the Happy Planner size of 7″ x 9.25″.
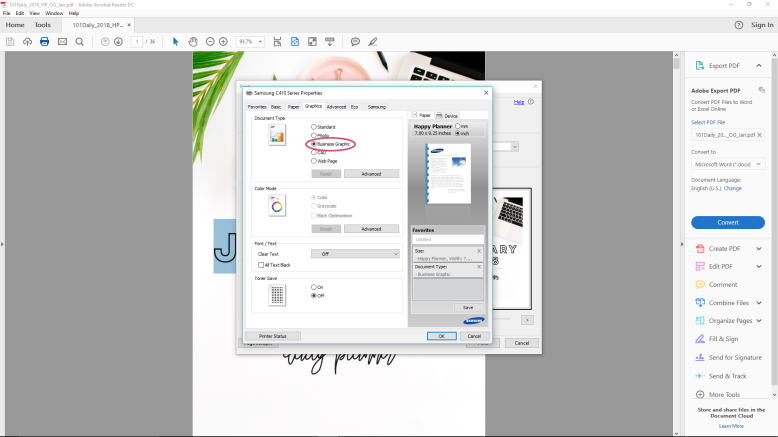
4 Set your print quality to the desired setting.
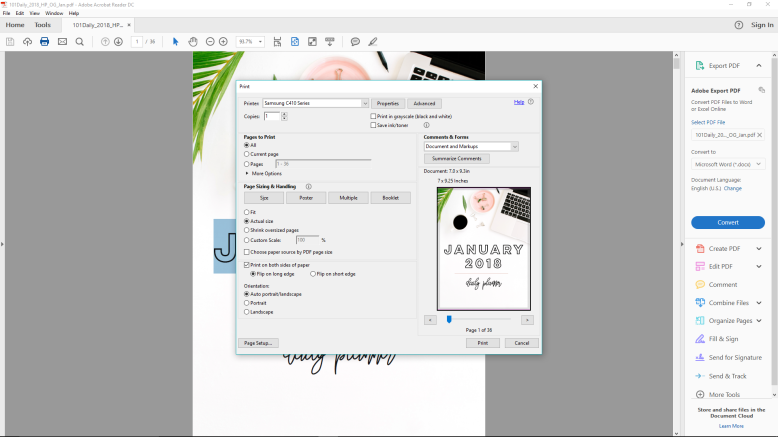
5 All done!
PRINTING ON LETTER PAPER
So I’m not going to give a full play-by-play for this one. The gist of it is – if your printer cannot print on Happy Planner size paper, you can still just print on full US Letter paper and THEN cut the pages out. I’m not as big a fan of this method because (1) the printing is a bit less aligned with the end result and (2) you get smaller scraps of paper, making them harder to reuse. Also you have to cut more. BUT it is nice to have the option if your printer can’t do the custom size.
If you are going to do this method regularly I highly suggest getting a proper paper cutter. That way you can simply do your measurement on the cutter and cut – instead of having to print out guide lines or mark with a ruler.
The only difference will be that you WILL NOT PUT IN A CUSTOM SIZE. Just leave it on US Letter (8.5″ x 11″). It will print out with your planner page centered on the paper.
If you want some cut lines to print on the paper to help you out – I got you. I made it in both PDF and PNG – either will work. Just gather up your planner pages, put them back in the printer, and print the proper number of copies of the cut lines. Flip your papers over and do it again.
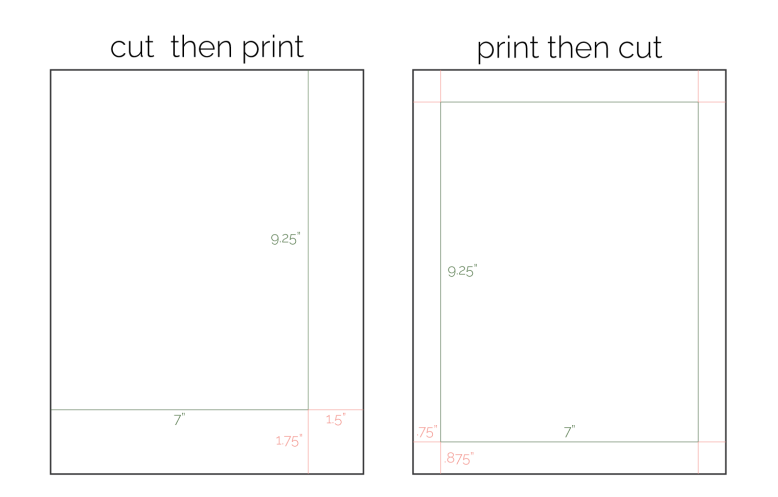
I’ve also made a nice little draw-up of where your cut lines will be if you’re doing the original ‘As Is’ (Cut then Print) or printing on US Letter (Print then Cut).
And once you’ve printed and cut out your pages, all you need to do is punch them and put them into your happy planner!
Hope this helps you in your planner printing! If you have any questions feel free to comment below, or if you’ve found a solution to a problem you’ve been having please comment too – I’m sure others are having that same issue. Be sure to pin this tutorial for the future.
Happy Planning!
Amanda